Creating Your Product
Creating your first design will be different for different people. Some may have a niche mapped out in their mind and be aiming to fill a shop straight away. Others may have one thing they think is funny or topical and want to see if they can make one product work.
Making the actual design is not very difficult. Don’t be fooled into thinking you need a complex design. Simple is often the best. There are several ways of creating your image and I will show you some of them. If you prefer to get somebody else to do it you can outsource this relatively inexpensively but I would recommend giving it a go yourself first. Or you could hire somebody on Fiverr and try yourself at the same time and see who does the best design. It can’t hurt to have a choice.
For simplicity’s sake let us go through the process of making one design just so that you can see how simple it can be.
Product Ideas
I'm going to assume you know your market and that you have found a group of people to market to. So now you need to find a design. Your design can be very simple, in other words just nice text or it can be very complicated you will see examples of both that work when you do your research.
If there's going to be any sort of demand for your product the chances are someone's already done something similar. There are plenty of places to look on the internet for product ideas. Print On Demand marketplaces have their own search function where you can find their best selling products. You can try Google Images, Pinterest, Etsy and even Amazon to see what other people have done in the past. Or if you want to skip the hard work you can use one of the several tools that we offer. Teespy, Sorting Social, and See What Sells are all freemium Print On Demand design research tools that show top-selling designs from multiple places around the internet. Each tool has its own advantages so check each one out to figure out which way of researching best suits you.
Now, back to the manual way of researching…
Here is an Amazon search for ‘biker’ t shirts as an example
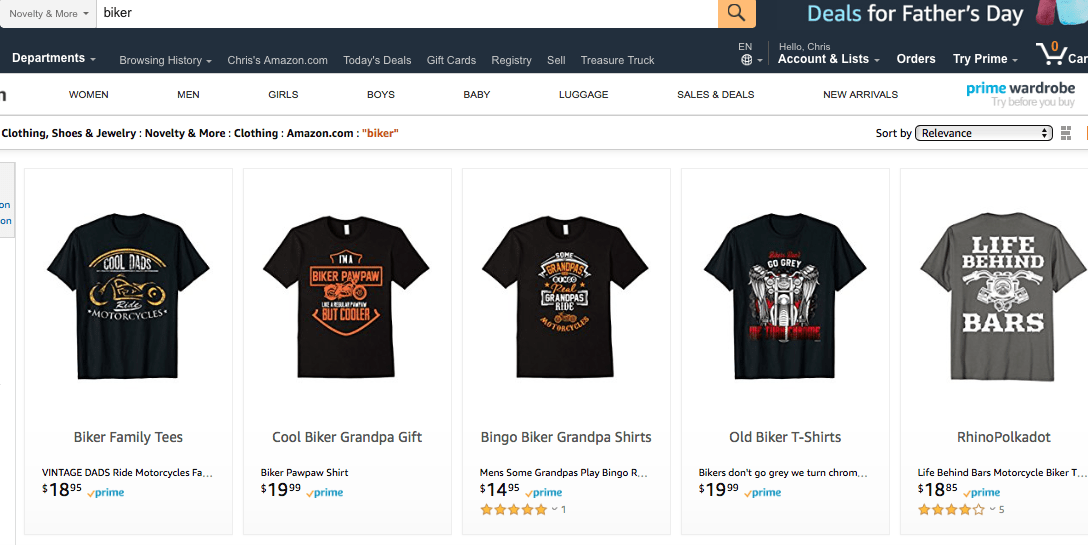
This search yielded over 2000 results so this is a popular market and you will see plenty of examples. This is not to copy, but this is to give yourself an idea what may work and what may not work and come up with your own solution. It's very important to be original please don't copy that's not the intention here you are just looking for clues at this stage of which direction to go in. Again, I'll talk more about this in the marketing section of this report.
The simplest idea is for some sort of funny slogan which people may take from memes or something that they know would apply to this particular market.
Creating Your Image
So if you have an idea for an image that you want to put on your products then you have the choice of doing it yourself or finding somebody to do it for you. I'll first run through a couple of ways to do it yourself. I would recommend you doing this even if you decide against it later. Then, at least you'll know what's involved if you have a little crack at it yourself first.
To put a slogan on a T-shirt or a Coffee mug or a necklace you will need to find some text to put on a transparent background. Now, to have a transparent background most of these Print On Demand companies would require you to create a .png file so when you save your image it has to be a .png and not a .jpg.
People use Photoshop to make their designs but you don't need to be particularly good at graphic design or to have Photoshop to do this. Free graphic design software like Canva, Pixlr, Gimp are commonly used.
Method One
If I'm doing something very simple like just a text using a nice font I actually use Google Slides. I don't know anybody else that does this and I can't remember how I discovered it but I'm going to tell you how I do it and hope that it helps you.
The good thing about Google slides is that if you have a Google account, which pretty much everybody has, you've got this on your computer already.
Here is the step by step
2 Click My Drive at the top
3 Click Google Slides
4 Click Layout and choose last option change canvas to blank
5 Click File then Page Setup near the bottom
6 Choose Custom from dropdown menu
7 Choose the dimensions that apply to the product you are creating
Now you have the perfect blank canvas. There are different ways to put text on the canvas but on Google Slides there is a Word Art function which is very good. There are absolutely loads of fonts to choose from and if you haven't got enough you can add even more fonts to Google Slides.
To get to Word Art click the insert button at the top of the page then click Word Art. Type your slogan into the box then you can change the font from the drop down menu in the header.
You can play now with your result. You can change the color, you can change the size, you can change the font again, you can add an outline to your letters, play with the thickness of the outline. All sorts of things that you'll find fun when you start doing it. Don't be tempted to make it too complicated. Sometimes simple is good.
Still keeping things simple I'm now going to show you how you can bring a transparent image straight into Google slides which you could possibly combine with your slogan should you so wish.
So let's say you want to target people that like motorbikes and Harley Davidson's in particular. You can click Insert at the top of your Google Slides page then select image from the drop down menu, then select search web. This will give you the normal Google image search so if we type in Harley Davidson to see what comes up and then we need to filter from the menu on the left hand side so that we end up with an image that doesn't infringe copyright and has a transparent background.
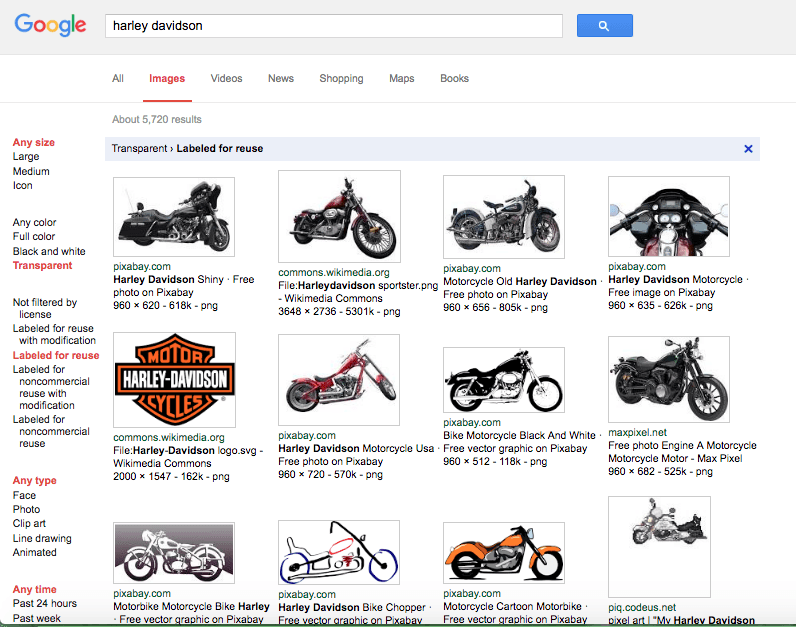
You will see in the picture that there are filters down the left hand side of the page. I have chosen the ones that are in red. So that is coming down the page, any size for the picture size , transparent for the type of picture and labelled for reuse so that there is no problem with copyright. You will notice that there are several filters for reuse. Labelled for reuse is the one without restrictions and they get progressively more complicated so I'm choosing the simplest option again.
Decide to use one of these or you may decide to look elsewhere. To continue from here I'm just going to choose one of these pictures. I quite like the pixabay one near the bottom which is basically a drawing on a transparent background. As you can see in the picture below by clicking on the picture in the search I've gone through to Pixabay and this is the page that allows me to download the picture without any restrictions. However, if you use the search function in Google Slides you don't need to go as far as this page Google will insert it direct from Pixabay and you don't need to put it on your computer.
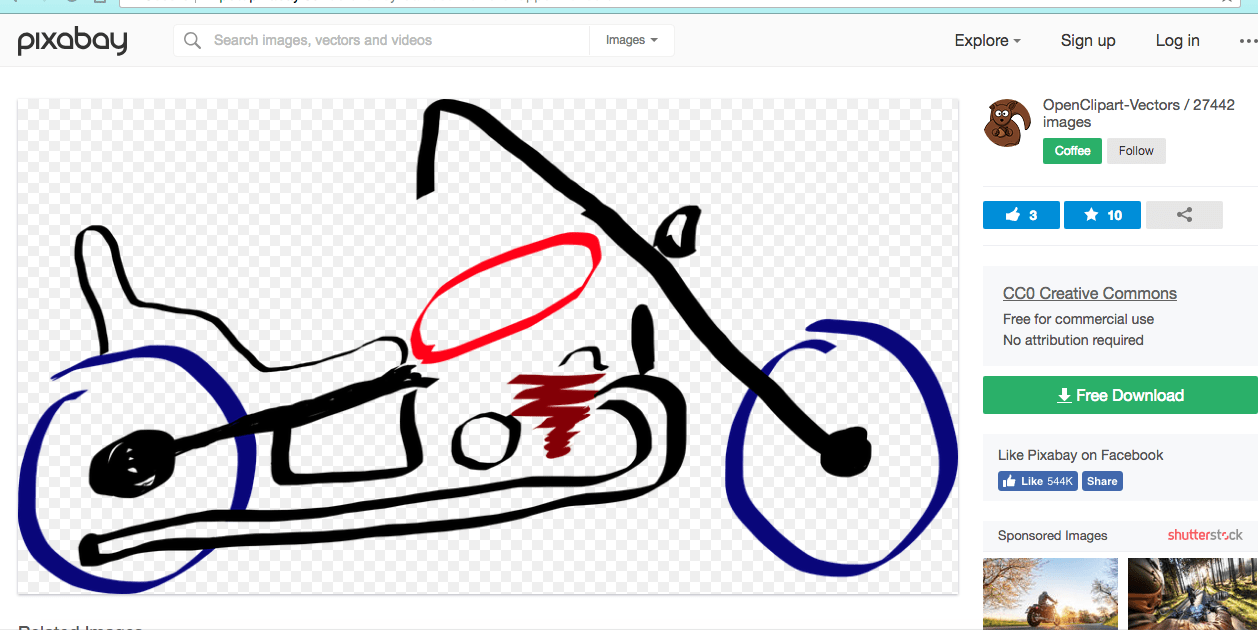
If you look at the picture of the motorbike you will notice the square pattern in the background and it is that white and grey check pattern that you are looking for so that you are sure you have a transparent background.
You now know how to insert text into your canvas and also how to insert a picture into your canvas and you can easily combine the two. The choice is yours and I recommend that you try all of these to see which works the best for you. Testing is a great idea.
When you are happy with your Design in Google Slides you must remember to save the item as a .png file. To do that on your Google slides page click file, then download as, then .png image. You need to check you have saved with a transparent background and not picked up a white background while in Google Slides. If you are not transparent then you need to go to another website. The second website is called Lunapic which is also a very useful website in itself with many other uses but in this instance all we need to do is use their transparency tool. All you need to do is to click on that one color {white} to remove all of that color and leave it transparent. Then you are finished.
For your information you can use this website to easily change the colors of your designs. This is very useful to exchange black and white when you want to offer dark and pale t shirts.
Method Two
Canva is an alternative graphic creation software which is quit widely recommended in internet marketing circles. If you don't have Photoshop then this is the software that is most often used by marketers.
Most people use the free version for their design work. There is also a paid version which is currently $9.95 per month paid annually or $12.95 if you pay a month at a time. To download an image with a transparent background unfortunately you have to have the paid version which does make it very simple. However, there is a free 30 day trial of the upgrade which could be very useful to people just starting out. Alternatively, you can still use the free version to make your original image then save as a .png file and go to a second website to remove the background. Try and make sure your background isn’t cluttered or complicated as a solid color is much simpler to clear. This is a repeat of method one so back to Lunapic which is also a very useful website in itself with many other uses but in this instance all we need to do is use their transparency tool. If you have made a simple image in Canva with a solid white background or any solid color background then all you need to do is to click on that one color to remove all of that color and leave it transparent. You must press the Apply button which I keep forgetting to do in my hurry as it isn’t obvious in my world. Then, as before, you save it as a .png file and you have finished your graphic.
You can find Canva here https://www.canva.com/
Method Three
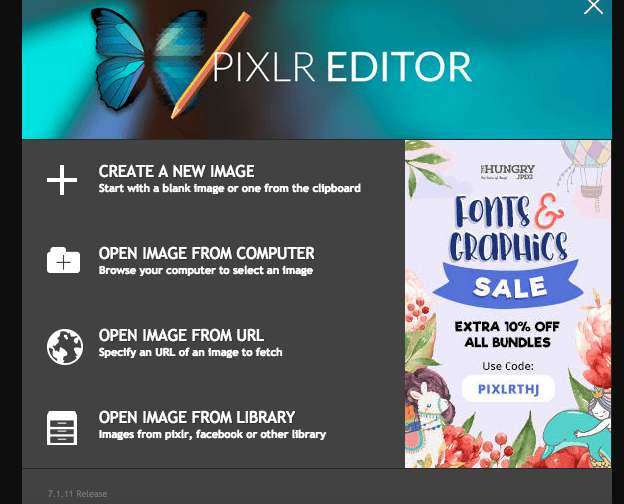
Pixlr. You may actually find this to be easier than the first two methods. You can see in the picture that you can add an image either from your computer or from a URL. So if you have previously managed to find a PNG file with a transparent background you can put it here and not have to worry about going to a second website to remove everything in the background. You can also add any slogan with the text editor without affecting the background. This is where your design skills come into play. I would recommend going over to Youtube and watching a tutorial or two on how to use Pixlr. There are plenty to choose from and people use it in different ways. You can always learn something and if you are going to market products it is a good skill to have.
You can find Pixlr here https://pixlr.com/
Method Four
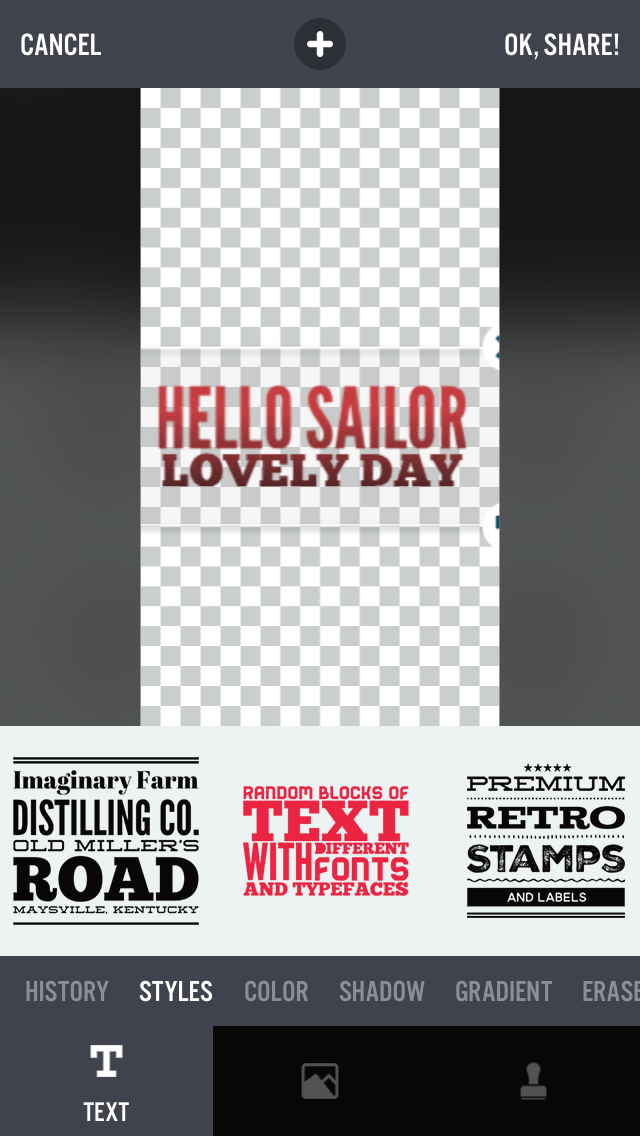
The simplest of them all is to get one of a few apps that you can use on your smartphone. Wordswag and Typorama are two such apps and they offer some very good templates that turn your ordinary text into something eye catching automatically. The good thing about this is that it gives you so many options to choose from in seconds. It saves time and gives better results than I could dream up myself.
I think these apps were almost certainly conceived to make flashy Instagram posts but they are very useful for Print design. I use Typorama which I choose because the first background it offers up to design on is transparent so it makes it really quick. There is a free version and a small fee for the Pro version. Wordswag costs $4.99 and Typorama costs $5.99. You really should get the Pro if you want to do it this way. Here is a sample image of how it looks on the phone. You will notice 3 of the 50 templates available below the transparent area.
Outsourcing Designs
You will have no trouble finding places to find a graphic designer. The problem will be deciding how much you want to spend and who is likely to give you a design that will work.
The most widely recommended site by marketers is Fiverr because it's cheap and there's a wide choice of services offered. My experience of Fiverr has been both good and a bit disappointing. You have to be careful because cheap isn't always the best option and also many of these people are just using / rearranging stock images so if you decided to use two different designers you may well get two very similar designs.
So with Fiverr you can get a bargain just be very careful when you're choosing who to give the work to. You can ask questions of the designer before you hand over your cash and I would suggest that you do that. Also make sure your instructions are very specific because you can end up with something you weren't expecting.
Shop around some of the other resource type websites too. Particularly if you have got a bit more of a budget. Take a look up at a website called Upwork also one called Freelancer and another called People Per Hour. They will all probably be a little bit more expensive than Fiverr but even if you
decide against them a little bit of research is always helpful.
It is very important that you are careful not to infringe copyright. Make sure you don’t use any Brand names or copyrighted logos in your product.
The Process
Gearbubble is the platform that I find the one that I like to use the most. So using Gearbubble as an example I'm going to walk you through the process of adding your Design to products of your supplier and then putting them on sale. Or how to launch a new product campaign as they do it on Gearbubble.
There is a big green Launch Campaign button on Gearbubble’s homepage. When you press that button you will be taken to a page which gives you a choice of all the products that you can put your design on.
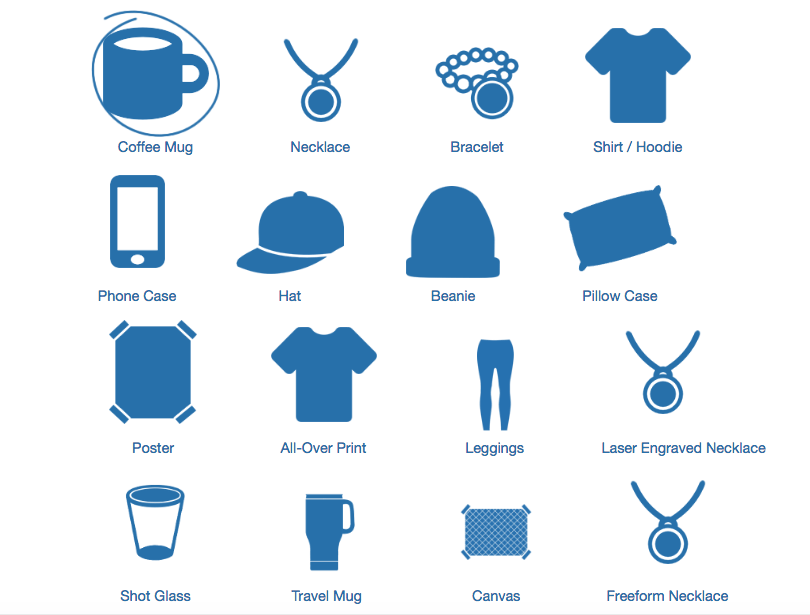
As you can see from the picture there is a wide choice of products. Some of these are very popular and others are probably not worth your time. The thing to remember here is that you can put the one design onto all of those products if you wish at no greater expense than your time.
For the purposes of showing you how this works I'm just going to go with the first item on the page and show you an example of printing on a coffee mug.
When you select coffee mug and press the Green next step button you were taken to the next page which is a blank coffee mug. Here if you have done your design correctly you will have an image to upload to give you your product.
The slight complication here is that the different products require different sized images. For instance, the image required for the front of a T-shirt is considerably bigger than the image required to print on a coffee mug. Another complication is that people talking different size terms. So in this case Gearbubble are talking in inches whilst you may well have saved your image in pixels. You need to understand how pixels relate to inches and vice versa and possibly centimeters in other instances.
I will provide a chart which will help you with converting pixels to inches or inches to pixels somewhere in addition to this report.
Going back to printing the mug as you can see in the picture the upload design page has a blank mug and other details on the left hand side. The first box headed default Style gives you a drop down menu or for choices of 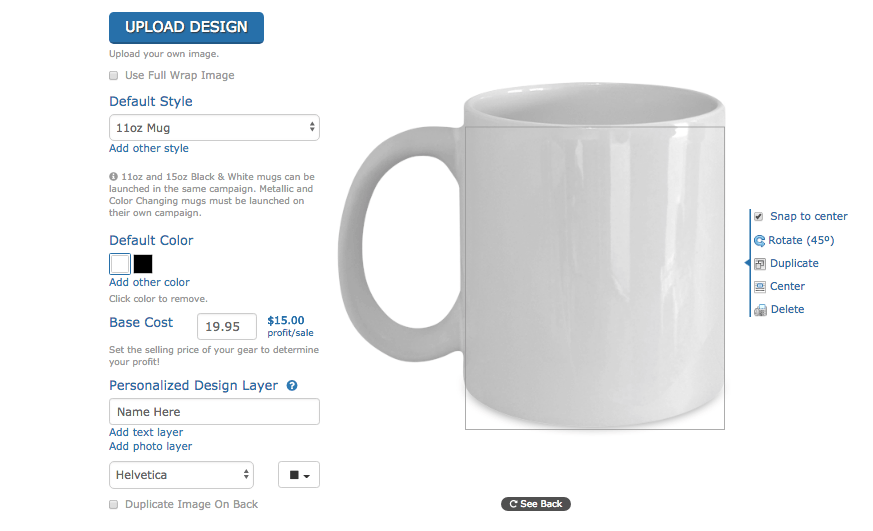
styles for your mug design. The first being a way in the picture the 11 ounce mug in a 15 ounce mug, metallic mug and a color changing mug. Then Dropping down the page you have the choice of color you have the price that you want to sell it at and the potential profit. In this example it looks quite overpriced in $19.95 for a mug with $15 profit that's something that you would and can easily play with as you can see from the difference in the two of your base cost would be $4.95.
Next is the personalization layer where are you can add specific words for individual people possibly this is where you can get the extra price by making unique products for individual people.
The choice of fonts and font colors makes up the last line.
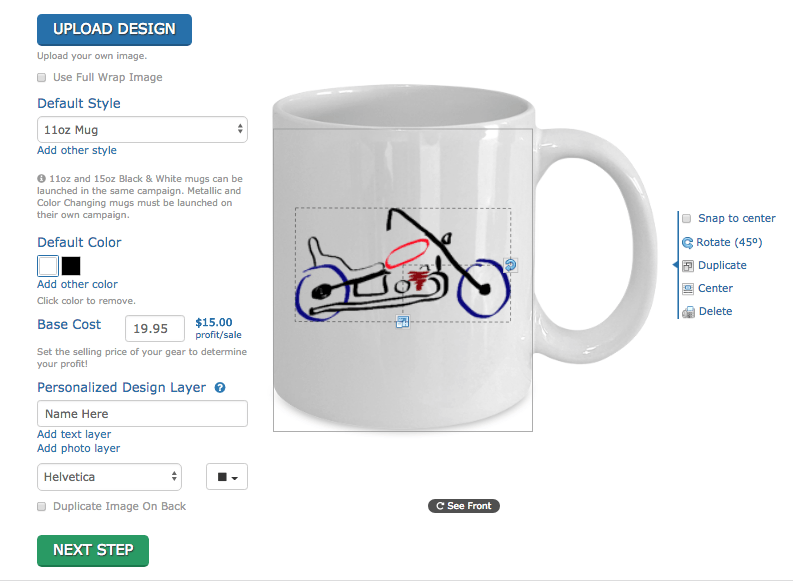
You can see in this second mug screenshot how the image fits onto the side of coffee mug and also on the very right hand side how are you can adjust the settings. You can actually print both sides if you wish. What you can't see in either of the two screenshots that I have provided is that when you start to upload the system gives you all the information you need to know about the size specifications of the image for the item that you are uploading. Therefore, you shouldn't waste any time uploading files that are too big or too small for the product you are working on.
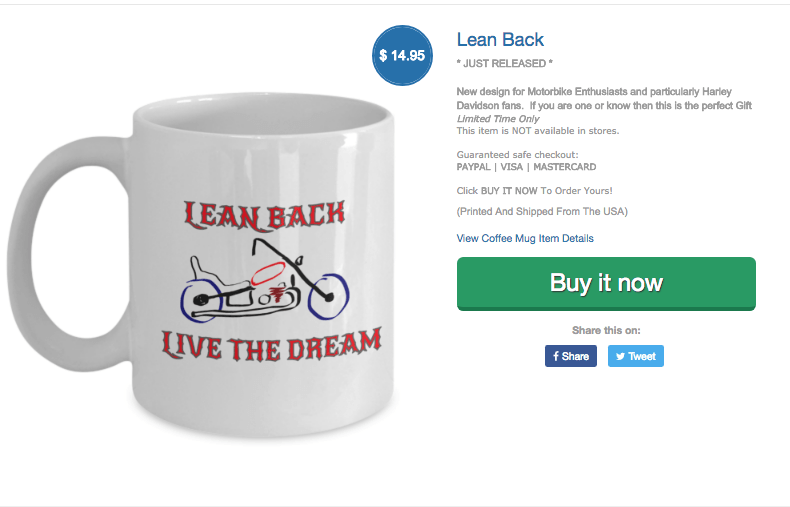
I added a slogan which I think is a pretty good match and uploaded to the website. When the image is created you go through to a page which formulates your sales page for you. You name your campaign, describe your product and set the campaign length. You name your URL
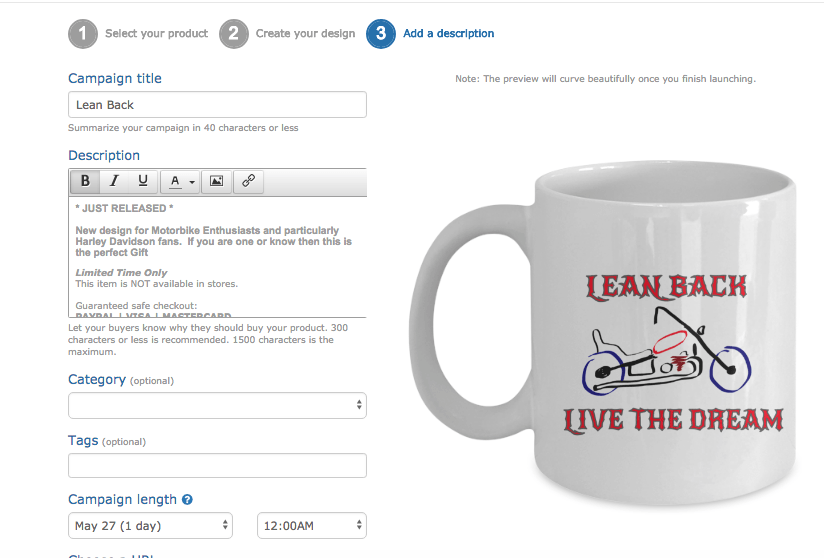
You can add tags that relate to your product to help with people searching the niche.
When you click through at the end of the page you have a sales page that Gearbubble has created for you at absolutely no cost to you and really looks very good. Below is the one I have worked through as our example.
As I write this I have no idea yet if it will work as I did this all in about 30 minutes and so far that time is my only investment. Now I have to decide my selling strategy.